Tuesday, September 30, 2008

How to Cut a Mango

A mango is a popular tropical fruit that can be found in most grocery stories. Though fresh mango is incredibly tasty, it is one of the most perplexing fruits to cut. It has a large, almond shaped seed on the inside which holds onto the mango flesh like it never wants to let go. There are plenty of tips and tricks out there on wrangling this fibrous fruit, but here's the one that always seems to work for me.

1. Start with a good, ripe mango. That is, it should yield to pressure just a hair over "slightly."


2. Slice off the mango's "cheeks." Think of your mango in terms of having three parts: two sides and one seed. The cheeks are the meaty sides of a fruit. You can tell by the shape of the body which direction the seed lies inside.

Use a sharp knife and cut as close to the seed as you can on either side. You will then have three parts.


3. Score the flesh into cubes, but only cut to just inside the skin; then invert to make the cubes pop out for easy removal.


The real key here is to make sure your mango is ripe. You may need to experiment over time to get a good sense of when a mango is at its peak. If it doesn't yield to gentle pressure, it's not ready.

How do YOU slice your mangoes? Comment and share!

Coming up: A short infomercial, and Make a Fruit Smoothie in less than a minute!

Sunday, September 28, 2008

In-A-Pinch Breadcrumbs


Breadcrumbs are one of those things that are great to have on hand in the pantry because they don't really go bad very quickly. But sometimes you just don't have them or you need a little more than what you've got left in the bag.

Never fear! Breadcrumbs are easy to substitute and a lot of fun to experiment with. Here are some options for you:

1. Use stuffing mix. Yes, I'm talking Stove Top or even your average generic brand of stuffing mix. I actually prefer using these to "regular" breadcrumbs because they're already seasoned. Just pop the dry mix into the food processor* and whirl away until you have what you need.

2. Make them homemade! Yes, you can make homemade breadcrumbs in no time whatsoever. Take several slices of whatever sandwich bread you have on hand and process into crumbs. Toast them on a cookie sheet in the oven at 400 degrees or in a dry pan on the stove.

I've never tried toasting the bread first and THEN processing it, and I bet it would work, but I'm guessing it would take longer. My toaster oven can only handle three slices of bread at a maximum. But of course, if you had leftover toast for some reason or other leftover bread, those would work perfectly.

3. Mix and match your dry pantry goods. Crackers are a staple that should always be kept in your pantry for all your cooking, baking, and snacking needs. Dump a sleeve of them into the food processor and add some extra flavor with potato chips, sliced almonds (the flavored ones for salads are great for this), sunflower seeds, or whatever you have that's dry and sounds like a good flavor match for what you're using the breadcrumbs for.


I used Townhouse crackers and ranch-flavored sliced almonds for the breadcrumbs in Kate's Toasted Ravioli.

* No food processor? No problem! Get yourself a large baggie and crack away at it with a rolling pin, a rock, your fist, or I suppose you could use a sturdy coffee mug.

Friday, September 26, 2008

KW's Creamy Coffee Cake


The reason why this is called a "creamy" coffee cake is because it is so moist, you won't even believe it. It hails from my dear friend KW in California. She shared it with me last summer during a time when I was charged with feeding 30+ hungry teenagers for 10 days.

KW's Creamy Coffee Cake

1/2 C. oil
1 pkg. instant vanilla pudding (larger box if you can find it)
4 eggs
1 box yellow cake mix (or white or whatever you like)
2 tsp. vanilla
8 oz. sour cream (roughly)

Blend and mix for 2 minutes in mixer on medium speed. Grease your cake pan. You can use an angel food pan like KW does or I've found that a bundt pan works great too.

Pour 1/2 mixture into cake pan. Go easy on this half because it always seems like you need more, when really, the second half is going to come up short. Now make the topping.

1/2 C. ground pecans (or coarsely chopped; toasted if you can)
3/4 C. brown + granulated sugar (mixed)
cinnamon (I never measure cinnamon; it's way too good to measure)

Sprinkle 1/2 of the topping over the batter in the pan, then swirl with knife. Pour in remaining batter, then drop in the rest of the topping. Bake 1 hour at 350 degrees.

KW has made this recipe as muffins. It made 24; she baked them at 350 degrees for about 20 minutes. I fully intend to give that a try one of these days.

Wednesday, September 24, 2008

Kate's Toasted Ravioli


My sister-in-law, Kate, is not only the loveliest woman ever to grace my brother's romantic path, but she is also a very fine cook. A few years ago, she shared this recipe with me, and it quickly became one of our family's staple meals.

Kate's Toasted Ravioli

Frozen Ravioli (whatever kind you like)
Breadcrumbs
Grated Parmesan
Milk

Preheat oven to 400 degrees. Fill a shallow dish with breadcrumbs and mix in a generous sprinkling of Parmesan. Fill another dish with milk. Dip raviolis one at a time in the milk, then breadcrumbs, pressing down on them to coat with crumbs. No need to thaw the raviolis first. They're much easier to handle when they're still frozen.

TIP: Use one hand to grab the ravioli from the bag, dip, and drop into the milk. Then use the other hand to scoop, cover, and press breadcrumbs. This will eliminate the infamous "club fingers" that will inevitably come with messy wet breading procedures.


Place the coated ravioli onto a lightly sprayed baking sheet and bake at 400 degrees. Bake time varies depending on the size of your ravioli. It may only take 15 minutes, but it might take up to 25.

Start with 10 minutes, then check them. You're looking for a nice golden brown color. You'll need to flip halfway through the cooking time, so be sure to keep an eye on them. (They don't burn super easy though, so don't get TOO stressed out about it.) As Kate told me, "You'll know they're ready when they start oozing filling."

Serve with marinara or spaghetti sauce, whatever you like to do. I served mine last night with a mushroom spaghetti sauce with ground beef and onions added.

Monday, September 22, 2008

The Plymouth Fury II


This is a knock-off from a little delicatessen called Firebrand in eastern Colorado. They call it the Plymouth Fury because it has turkey and cranberry sauce in it. (You know, Thanksgiving, pilgrims, Plymouth Rock, etc.) My Junior year of college, I probably ate one of these at least twice a week. Their soup at the Firebrand is to DIE for.

I've knocked-off the Plymouth Fury many times over the years in various incarnations. This is the latest one and the first I have documented.

The Plymouth Fury II

Bread (original uses sourdough)
Sliced deli turkey
Cream Cheese
Cranberry sauce (whole or jellied)
Lettuce (original uses alfalfa sprouts)

Spread your bread or roll or bagel with a generous offering of cream cheese. Both sides please. Arrange the turkey, then top with cranberry sauce and lettuce. (I have to say that the alfalfa sprouts are quite tasty. But I don't usually buy that sort of thing.)

Saturday, September 20, 2008

5-Minute Chocolate Mug Cake

We have our first new Foo Fan recipe submission! Thank you to Michelle for passing along this little dandy of a treat. I couldn't resist trying it. Who doesn't have five minutes to invest for some chocolate cake love? Nom nom nom...


5-Minute Chocolate Mug Cake

4 Tbsp. flour
4 Tbsp. sugar
2 Tbsp. baking cocoa
1 egg
3 Tbsp. milk
3 Tbsp. oil
3 Tbsp. chocolate chips(optional)
a small splash of vanilla extract
1 coffee mug

Add dry ingredients to mug, and mix well. Add egg, and mix thoroughly. Pour in the milk and oil. Mix well. Add chocolate chips (if desired) and vanilla extract. Mix well! [Is your fork getting tired yet?]

Put your mug in the microwave and cook for 3 minutes at 1000 watts. [Here's a site that will convert wattage for your oven.] The cake will rise over the top of the mug, but don't be alarmed!


Allow to cool a little (the mug WILL be hot), and tip out onto a plate if you like. Then EAT!

Michelle says, "This can serve two if you want to feel slightly more virtuous."

Suggested Experimentations:
* Add more than the necessary chocolate chips
* Swirl in couple Tbsp. raspberry preserves
* Add coconut
* Swirl in chocolate syrup (like for milk)
* Add nuts

For any of these additions, you could simply sprinkle/pour them on top, and they will sink in as the cake bakes.

The Taste Test: This is most definitely a good one if you're in serious need of chocolate fix. I would highly recommend not skimping out on the chocolate chips--in fact, be generous! I'm going to try putting in some raspberry preserves someday in the future. It was a lot of fun to make. Thanks, Michelle!

Thursday, September 18, 2008

The Fooblog is back! (with Hot Dogs)

I have been doing Project 365 which is a challenge to take one picture a day for one year, and I've been chronicling my efforts on my 
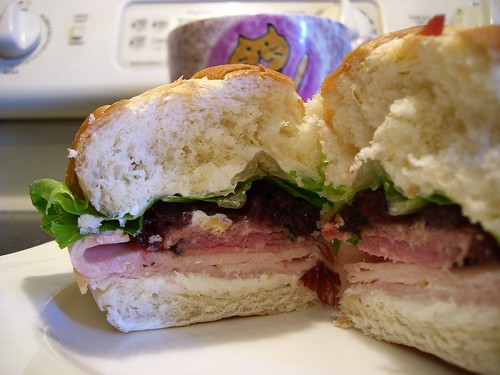
Project 365 blog. I've noticed that I take a hefty number of images that feature food in some way or another.


So since I've got my camera out already, I'm going to go ahead and bring this blog back after it's lain dormant for nearly four years. After all, I love cooking (and eating), so I might as well share that with the world. Again.

One of my passions is experimenting with food. I'm not a picky eater, and ever since I had the peanut butter and mayo sandwich my friend Ed recommended, I rarely knock a strange concoction until I've tried it. I would ask you to do the same with some of the strange things I might post. ;o)

That said, I do believe I'll start us off with something truly interesting. Follows is a step-by-step recipe for a grilled cheese that just about any kid is going to love. My daughter is one of the pickiest eaters I know, and she ate the entire sandwich with zero reminders to focus on her plate.
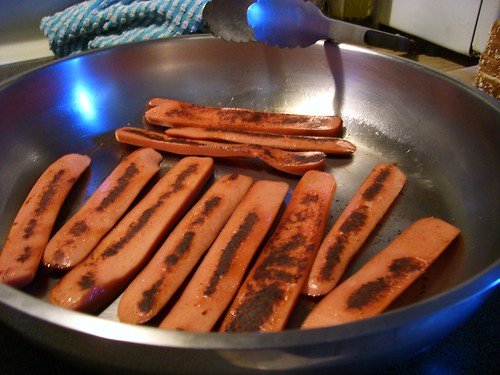
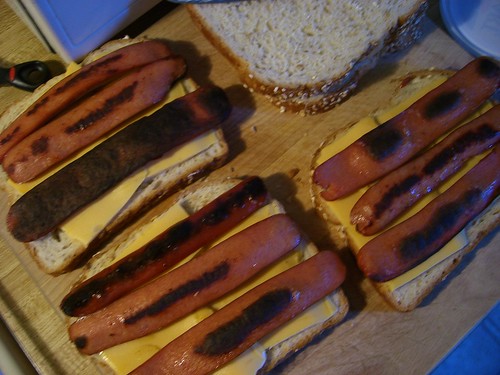
----------------------------------------------------------

Dogged Grilled Cheese

Split one hot dog per sandwich into thirds vertically. Grill the slices on both sides.


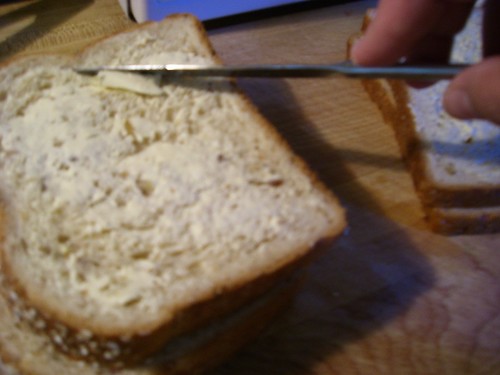
Butter one side of each slice of bread, two per sandwich of course.


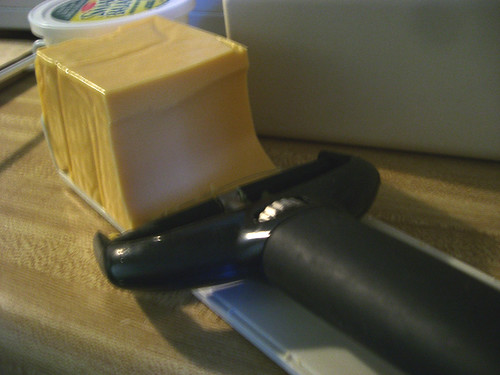
Add some slices of cheese to the unbuttered side of half the bread slices. Velveeta works excellently.


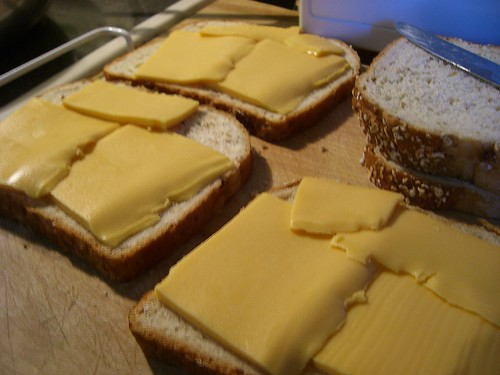
Place the grilled hot dog slices on the cheese.


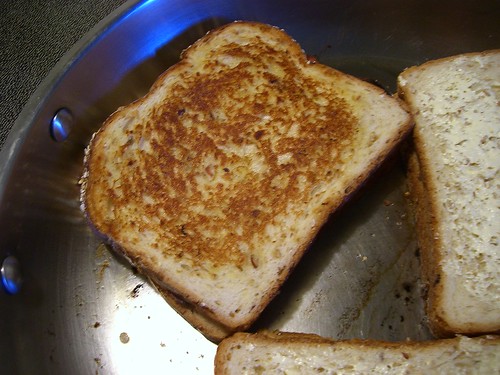
Top the sandwiches with their other halves and grill as you normally would for grilled cheese. Careful when you flip!


Serve just slightly cooled down because that cheese can get hot and cooling helps the goo congeal. Doesn't it sound delicious already? Congealed goo...mmm...


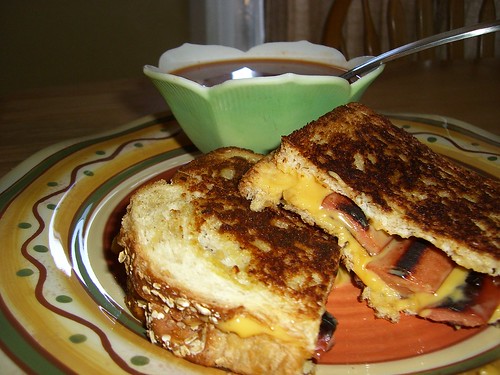
We served ours with vegetable alphabet soup, and both my kids ate every last bit. I was truly amazed.